
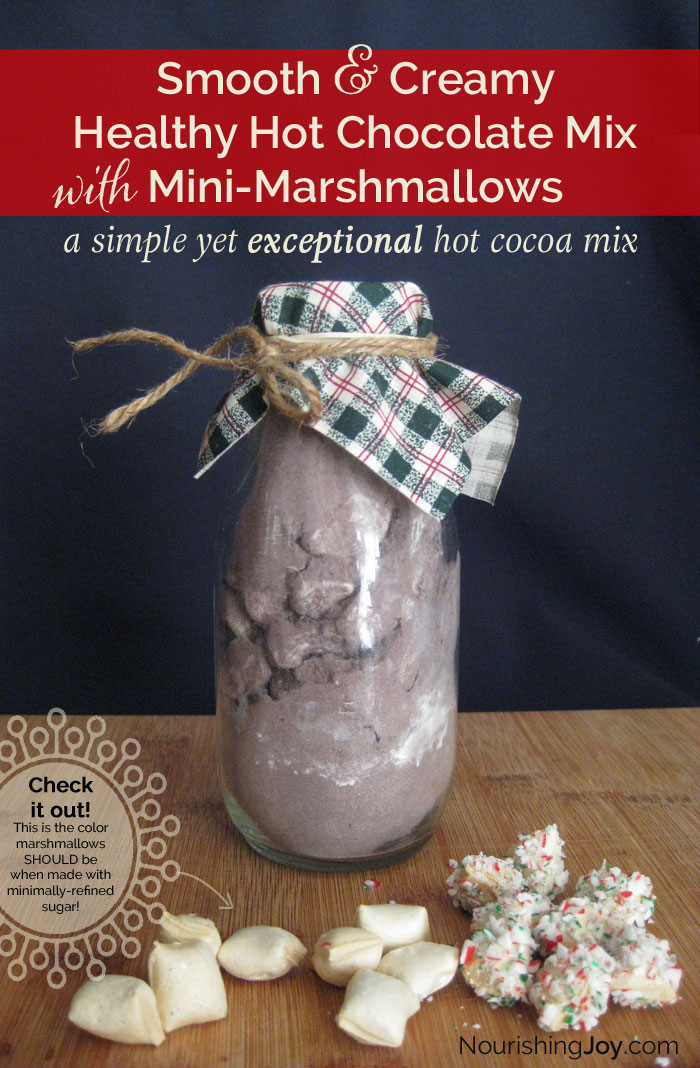
DIY Homemade Hot Chocolate Mix + Homemade Mini-Marshmallows
This post may contain affiliate links, including those from Amazon.com, which means we earn a small commission off your purchases. And here's the thing: We only mention services and products that we think are truly worth your attention, whether they're free, paid, or otherwise. This site relies on YOUR trust, so if we don't stand behind a product 110%, it's not mentioned. Period.
You may have tried making homemade hot chocolate mix before, but I assure you, you haven't tried this one.
This is not because the recipe is hugely unique – it has two ingredients I haven't seen together in other recipes (which are the secrets to its success), but overall, it's fairly similar to other recipes out there.
However, what IS unique is that it meets ALL the requirements for what a good homemade hot chocolate mix should be:
- creamy and shelf-stable without relying on processed milk powder
- creamy without relying on liquid milk either. I want a hot chocolate mix that can be taken camping and stirred up using just hot water!
- smooth sippin' – no sugar granules left at the bottom of the cup or endless stirring allowed. 🙂
In short, this recipe is your creamy, shelf-stable, smooth, decadent, real food, homemade hot chocolate mix answer.
So, let me let you in on the two secrets to this homemade hot chocolate mix:
1. Cocoa Butter (or white chocolate, if necessary): Cocoa butter (sometimes referred to as “cacao butter” in its raw state) has a seductively silky, creamy mouth-feel and substitutes beautifully for various dry milk products. Thus, I call for very finely shaved pure cocoa butter as the shelf-stable creamy ingredient. You can use white chocolate in its place if it's easier to find, as white chocolate is made predominately of cocoa butter – just know that the drink will be a bit sweeter.
I also choose to call for cocoa butter instead of white chocolate chips because some brands of white chocolate use additives and stabilizers like soy lecithin and gums, which some people – including me – prefer to avoid. Again, use whichever you'd like, but this is why I chose to call for cocoa butter as the standard.
2. POWDERED Sugar (very minimally refined, of course): By using powdered sugar instead of standard granulated sugar, the sugar dissolves almost instantly when hot water is poured over the powder, creating a silky smooth drink. And from a real food standpoint, I'm okay with powdered sugar because it's easy to make your own no-refined-sugar powdered sugar, which ensures that you've used a sugar you're comfortable using (either from a real food standpoint or a fair trade standpoint). It's the best of both worlds.
So, now a word about your cocoa, because it's important….
Cocoa powder forms the base of this recipe, so it's important to choose a cocoa that meets your criteria so that you can enjoy every cup of homemade hot chocolate to the max.
First of all, is your cocoa fair trade?
Chocolate is one of the most heavily traded commodities on the face of the earth (with a scientific name like theobroma, which means “food of the gods,” it's no wonder that the world can't seem to get enough chocolate!) – and it's one that regularly racks up points for unethical labor practices, child slavery, environmental degradation, and deep corruption.
Thus, while I certainly don't buy all products fair trade, my husband and I do make a point to purchase certain items, such as coffee, sugar, and chocolate, exclusively fair trade. We figure if we can't afford them, we don't need them, and if we can afford them, we can afford to put our dollars toward a fair, sustainable option for those luxury items.
Thus, fair-trade cocoa powder for me is a must. Many stores in urban areas at this point carry at least one fair trade option, but if not, you can find it online. Also, since more and more companies are coming on the market that offer fair-trade chocolate, prices are becoming more and more reasonable and the overall quality is improving, so hopefully a fair-trade option will fit in your budget too.
Flavor – choose your favorite!
When it comes to flavor, different cocoas will taste vastly different, so consider these options to make the hot cocoa you'd like best:
Dark cocoa, aka “dutched” cocoa or “alkalized” cocoa: This type of cocoa is treated with lye to break down some of its acidity and provides a mellow flavor. This is the type of cocoa most commercial hot chocolate brands use, so if you'd like your homemade hot chocolate mix to taste like the store-bought varieties, try this version first.
“Regular” cocoa, also known as “natural” cocoa: This is the type of cocoa you have if the label doesn't state what kind it is. This gives a deep, rich, slightly bitter flavor, just like dark chocolate does as compared to milk chocolate. It's scrumptious – and really should earn the name, “sipping chocolate.” 🙂
Black cocoa or black onyx cocoa: This type of cocoa is an “ultra-dutched” cocoa, resulting in a nearly black color. (It's what I use for homemade Oreos and as one option for homemade black food coloring.) I wouldn't use it exclusively in this recipe, but if you have some on hand, adding a bit to the mix – say, perhaps up to 20% of the cocoa powder in the recipe – takes the flavor of the regular dutched hot chocolate mix and puts it over the top.
(By the way, if you love chocolate, definitely try our DIY homemade fair trade chocolate bars, too!)
Happy sipping!

Homemade Hot Chocolate Mix
Ingredients
- 40 grams 1/4 cup cocoa butter, cut into small pieces, or white chocolate chips
- 2 cups powdered sugar
- 2 cups cocoa powder
- 2 teaspoons sea salt
- 1 vanilla bean, optional
Instructions
- Place the cocoa butter pieces in the bowl of a food processor and process until very finely chopped. Alternatively, you could grate the cocoa butter by hand to produce very small flakes.
- Add the powdered sugar, the cocoa powder, and the salt to the food processors and pulse until everything is very finely powdered and the mixture is well-mixed.
- Scrape in the seeds from a vanilla bean, if using, then place the split bean in the storage container along with the hot chocolate mix.
- To serve, place 2 heaping tablespoons in a large mug (more if desired) and pour boiling water or hot milk over. Stir until dissolved. Sip and enjoy.
- Store mix in an airtight container for up to six months.

Homemade Mini-Marshmallows
Ingredients
- 3 tablespoons gelatin, see [where to find grass-fed bovine gelatin]
- ¾ cup cold water
- 2 cups cane sugar
- ½ cup honey, preferably with a neutral flavor
- ½ cup cold water
- ¼ teaspoon sea salt
- 2 teaspoons peppermint extract, optional
- 1 cup powdered sugar, for dusting (see [how to make your own homemade powdered sugar])
- crushed candy canes, for dusting, optional
Instructions
- First, prepare your work space and equipment, as you won't want to do this as you go. Liberally butter a 9x13 pan or lay out 2-3 sheets of parchment paper, approximately two feet long each. Prepare piping bags if using.
- In the bowl of an electric mixer fitted with the whisk attachment, pour in the 3/4 cup cold water and sprinkle the gelatin over. Let sit.
- Meanwhile, place the sugar, honey, 1/2 cup cold water, and salt in a heavy-bottomed saucepan, preferably about 3-quart size and one from which it's easy to pour. Place the pan over low heat and stir until the sugar is dissolved. Increase the heat to medium and boil, without stirring, until the sugar syrup reaches 250°F, 12-13 minutes.
(You may note this is a slightly higher temperature than "regular" marshmallows, and this is intentional. I like my mini-marshmallows to have a bit more "chew" in them. If you don't share this desire and would prefer them as light and fluffy as possible, pull the syrup off the heat at 240°F. This is also why I don't add the traditional egg-white meringue, just in case you were wondering. 🙂 ) - When the syrup reaches the desired temperature, turn the mixer on medium-low and slowly pour the syrup over the gelatin, drizzling the syrup down the sides of the bowl, if possible. Add mint extract if using.
- When all the syrup has been added, increase the speed and beat on high until the mixture is off-white, glossy, thick, and nearly tripled in volume, about 8 minutes.
- Scrape the marshmallow creme into your prepared piping bags OR into the buttered pan. If you'd used the pan, smooth the top and set aside. If you're using the piping bags, pipe several long strips down the length of each sheet of parchment paper, about 1/2-inch wide each, fitting as many strips on the paper as possible without touching. Work quickly, as the marshmallow will begin to set right away and you'll no longer be able to pipe smooth strips.
- Let sit for 6-24 hours, then prepare to cut the marshmallow. Place powdered sugar in a bowl and have at hand.
- If the marshmallow is the pan, lift the marshmallow up and out, then using a large powdered-sugar-dusted knife, slice the marshmallow into 1/2-inch cubes (or whichever size and shape works for you).
- If you piped the marshmallow onto the parchment paper, use a pair of powdered-sugar-dusted scissors to snip the strips into 1/2-inch pieces.
- Place the diced marshmallows into the powdered sugar or the crushed candy canes and toss until there are no sticky sides left. Place in the hot chocolate mix or store in a jar in a cupboard for up to one month.

6 Comments