How to Make Homemade Evaporated Milk and Sweetened Condensed Milk (the Easy Way)
This post may contain affiliate links, including those from Amazon.com, which means we earn a small commission off your purchases. And here's the thing: We only mention services and products that we think are truly worth your attention, whether they're free, paid, or otherwise. This site relies on YOUR trust, so if we don't stand behind a product 110%, it's not mentioned. Period.
Want to avoid all the thickeners and preservatives that some brands of evaporated milk use? Make it at home!
Evaporated milk, that slightly thick milk that typically comes in a can, is a fairly easy ingredient to make at home, considering it has only one ingredient: milk.
But despite its simplicity, it's also a bit cumbersome when done in the traditional way on the stovetop, which is how I've done it for years.
To make evaporated milk, you heat milk and evaporate away 60% of its volume. The final result is silky and sweet and it's what we use to make many creamy concoctions where whipping cream is too heavy and whole milk is too light, such as homemade condensed cream of mushroom soup.
Its cousin, sweetened condensed milk, which is used in many beloved holiday recipes, is exactly the same thing except you whisk in a bit of sugar as part of the condensing process.
While this sounds simple, the cumbersome aspect comes in the method. In order to keep the milk from scorching while it heats and to keep it evaporating efficiently, we have to keep it on very low heat and whisk it often. And honestly, I have yet to make a batch where I haven't scorched it, even when my burner is on its very lowest setting and I whisked every five minutes for hours on end.
But then I realized an easier way was to be had. 🙂
Slow cooker, to the rescue!
A slow cooker is an easy way to heat the milk evenly without scorching it – or at least minimizing the amount that sticks to the sides.
It's also a fairly hands-off method, so you can go about your day much more freely without having to remember to whisk the milk every few minutes. I still take off the skin that forms on the top every hour or so, just to keep it evaporating efficiently and to minimize the amount that sticks to the side, but other than that, you can just let it sit while you go about your day.
Oh, and please remember that slow cookers vary wildly in their temperatures and in their volume, so while I've listed what typically works for me, just keep an eye on yours and adjust as needed. I suggest giving yourself at least 24 hours for this project the first time you make it. You likely won't need anywhere near that amount of time, but better safe than sorry. 🙂
Homemade Evaporated Milk
Ingredients
- 3 cups water (for measuring)
- 2 quarts (8 cups) of milk
Instructions
- First, pour three cups of water into the empty slow cooker and use a ruler to measure the depth. Note this measurement, as this is the depth your milk will be when it is finished.
- Pour water out and place the milk in the slow cooker. Heat on high for 18-20 hours with the lid off, unless you notice scorching, then switch it to low. Remove the skin that forms on the top periodically, especially toward the end of cooking, but don't scrape up any milk that cooks onto the sides.
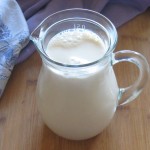
- When the evaporated milk has reached the desired depth, pour into a clean jar or pitcher and use in your favorite recipes. Store in the refrigerator for up to one week.
Notes
Homemade Sweetened Condensed Milk
Ingredients
- 7 cups of milk
- 2 cups liquid sugar, (maple syrup, honey, etc) OR crystalline sugar (evaporated cane sugar, sucanat, etc)
- 4 tablespoons butter
- 2 teaspoons vanilla extract
Instructions
- First, pour 3 1/4 cups of water into the empty slow cooker and use a ruler to measure the depth. Note this measurement, as this is the depth your milk will be when it is finished.
- Pour water out and place the milk and the liquid sugar in the slow cooker and stir to combine. Heat on low for 19-21 hours with the lid off. (If you're using a crystalline sugar, whisk it regularly during the first hour after it begins to steam in order to fully dissolve the crystals. Remove the skin that forms on the top periodically, especially toward the end of cooking, but don't scrape up any milk that cooks onto the sides.)
- When the sweetened condensed milk has reached the desired depth, pour into a large bowl and add the butter and the vanilla. Once the butter is melted, whisk well and pour into a clean jar or pitcher and use in your favorite recipes. Store in the refrigerator for up to one week.
Notes
- Note: Using a liquid sugar is the easiest method by far when using a slow cooker to make homemade sweetened condensed milk, but liquid sugars tend to be highly flavorful as well, so they may not be appropriate for your final outcome. I find maple syrup provides my favorite, most multi-functional sweetened condensed milk, but if you need something more flavor-neutral, use an evaporated cane sugar.






Could regular sugar be used, and how much? As much as I hate to use it, I live in Argentina and am not sure if I’ll be able to find a healthier alternative. :/
Yes, absolutely. Use whatever’s available to you! You can substitute any granulated sugar at a 1:1 ratio. 🙂
Yay!
Have you ever canned either of these recipes to lengthen their shelf life?
No, I haven’t, merely because canning dairy products requires a pressure canner and the wisdom & trained eye that comes with plenty of diverse canning experience – neither of which I have. (Also, the USDA strongly recommends that anything with dairy is NOT to be canned at home and specifically states that those who *do* fit the above guidelines). I typically stick to tried-and-true water bath canning with fruits and vegetables. 🙂
If you (or anyone else) has experience with canning dairy products, would you mind sharing your wisdom?
As this post is over two years late, you or the commenter above may have already found your answer.
The Ball Canning Company, as well as USDA guidelines do not recommend home canning for milk products. A quick google search of either or both turns up this info.
I have 7 gallons of canned milk in my pantry right now. While it is not recommended, it can be done safely.
These recipes are great, thank you. Have you tried cooking the milk in a container instead of straight in the slow cooker? I made dulce de leche in the slow cooker in canning jars and it worked well, except it used premade sweetened condensed milk which tasted very chemically.
I haven’t tried it but that sounds like a GREAT idea! Thanks for sharing. 🙂
Thanks for this recipe! I made it today for my Thanksgiving pies. I halved the recipe and did what the previous commenter posted about cooking it in a smaller dish in the crock pot. I did a water bath – I’m not sure if that’s what she meant or not, but I wasn’t sure it would work otherwise. Mine was done in about 9.5 hours (which was a relief because I didn’t want to have to get up at 3 a.m. to finish it). 🙂
I’m just wondering if you’ve ever found a use for the milk “skin” (the fat you skim off). I get it when I make homemade yogurt, too, and it seems like such a waste to throw away.
Thanks for sharing what worked for you! The water bath is a great idea. 🙂
As for the skin – which is actually coagulated milk proteins, not fat – I must admit I’ve never found a use for it, even when I’m heating milk for coffee or hot chocolate. Maybe it could be chopped up and dehydrated for a faux milk powder? Although it’s mostly whey, so it likely wouldn’t be terribly tasty….
Perhaps another reader could chime in?
Have a happy Thanksgiving!
I give the skin off the milk to the chickens. They love the treat.
Oh, PERFECT! What a great idea! 🙂
I like the slow cooker idea. Would a double boiler work? What do you think about those nuwave cookers, would those work as we could control the temperature.
Thank you
Yes, a double boiler should work just fine! And I’ve never used a Nuwave oven, so I can’t give a thoughtful response on that. Perhaps another reader has tried it or has insight to share?
Enjoy the evaporated milk!
THANK YOU! I will have to give this a try–my dad is lactose intolerant and I’ve never been able to find lactose-free evaporated or sweetened condensed milk. This’ll let me make some with Lactaid. 🙂
Oh, what a great idea! Let us know how it works, as I’ve never tried it with Lactaid. 🙂
Do u use whole milk, 2%, skim?? I love being less dependant on store bought ingredients.
The more milkfat the better in this recipe, as it affects the final consistency as some of the liquid evaporates off, so whole milk if you can find it, definitely. 🙂
Is this recipe going to work the same with Goat milk? I am severely allergic to Cow milk but can tolerate a small amount of goat milk at a time. This would simplify my life if I can cook with my own evaporated milk!
I would think so, simply because goat’s milk is largely water as well. The only thing you’d have to keep an eye is the fact that the ratio of proteins, fats, and sugars are a bit different, so it may caramelize or thicken at a slightly different rate. But I don’t know! I’ve never done it, but I can’t think of any reason why it wouldn’t be possible. 🙂
Good luck and let us know how it goes!
Could you use heavy whipping cream in place of the 7 cups milk?
With the 1 to 1 ratio you mentioned I’d guess one could use Splenda for the 2 cups sugar.
This would be perfect for a diabetic such as myself.
No, I would not recommend using whipping cream in place of the milk, simply because the liquid to fat ratio is quite different to start with, so the cook times and the cook temperatures would need to be different in order to actually evaporate off the liquid without damaging the fats and actually coming out with a product that you’d enjoy eating. 🙂
Also, I would avoid Splenda completely, simply because it’s highly processed, and would use a stevia extract (either homemade or store bought) in its place. In fact, because you’re not using sugar, it could be even simpler – simply evaporate the milk, then stir the extract in when it’s finished (or near the end).
Hello! Would this work with raw milk?
Yes, definitely! 🙂
I have tried multiple times with multiple sugars and have ended up with a dark burned milk every time. I cut the cook time by a few hours and still have had no luck. What could be going wrong?
Hmmm… let me ask a few questions, just to troubleshoot:
All that said, I suspect that the heat is too high. Thus, assuming you have the heat as low as it possibly can go, I ask all these questions to see if there’s a way the heat can dissipate more quickly or to keep the milk moving while it’s evaporating. I hope we can figure out a solution that works for you! 🙂